There are various ways to do this, and everyone has their favorite type of fuel for a smoker, but this is how I do it. The man that sold me my first hive used the fuel that was handy to him, which was pine needles. So I simply adopted what he used, because I can get them most anywhere for free. Other people use other things, which I will eventually research for everyone. You can even buy smoker fuel online if you need to.
I get my pine needles from under some pine trees outside of a factory in my town. They have a row of them outside their gates, and I take several bags and fill them up, which lasts me for a couple of years. (only gather the dry needles) There may even be someone you know that has pine needles in their yard that they want to get rid of or throw away every year!
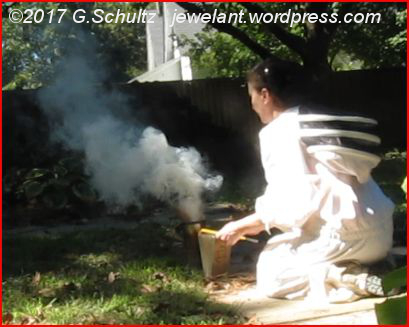
Lighting a bee smoker
I bought the biggest stainless steel smoker that I could afford. This gives lots of room for fuel, and you don’t have to refill it in the middle of opening a bunch of hives. I go out into the yard, preferably on a non grassy or cement spot to light it. I take with me a bag of pine needles, the smoker, a hive tool, an old pancake turner, a bic lighter, and a pair of scissors.
Then I take note of which way the wind is blowing so that I don’t choke myself to death when it fires off! Make a note, the wind sometimes does not cooperate. Most of the time it changes back and forth, and I end up getting smoked myself. This is why I understand the importance of not oversmoking my bees. They don’t love it either, and it can burn them if it’s too close.
I open the top of the smoker, make sure it’s empty. Then I take a handful of pine needles, and twist them up like a rope, fold in half, then twist again, leaving some ends to stick out for the first lighting. Note: it’s important to get the first handful of needles lit pretty good before shoving them down into the bottom of the smoker. If not, and it goes out, you’ll have to drag everything out and start over again. About half flames is about right.
Now I take the partly lit pine needles and shove them down into the bottom of the smoker with your hive tool, quickly puffing the smoker to get them to flame up. It’s okay if flames come out of the top of the smoker, just don’t put your face over the whole thing while you’re doing it. (grin)
Once you have this smoking pretty good, repeat the process as many times as it takes to fill it to the top, but remembering to use your hive tool or pancake turner to pack it in, and puff, puff, puff all the while you’re doing it.
You can pack pretty tight, and the better you puff and pack it, the longer it will stay lit while you are working the hives. Just remember if you aren’t using it a lot while working, to puff some air occasionally.
The last thing you do before closing the top is use your scissors to cut all the stray “stick-outs”, the edges of the pine needles that inhibit you from closing the lid. Once the edges of the pine needles are not sticking out, you can shut the lid and go work your hive!
NOTE: It’s impossible not to get some smoke in your face while doing this, unless you use a fan, which I had not though of until just this moment. Hey, PROBLEM SOLVED!

